This blog is about using MS VSCode as Django IDLE (OS: Mac OX, the steps are referenceable on Linux, Windows).
1. Download installation files and install MS VScode, Python from following links:
Optional: On Mac OS, I recommend homebrew for Python Installation because third party libraries’ dependency will be processed smoothly.
Install
homebrew:/usr/bin/ruby -e "$(curl -fsSL https://raw.githubusercontent.com/Homebrew/install/master/install)"Install
Python3:brew install python@3
2. Python Extension
Launch VSCode and install the Extension: Python
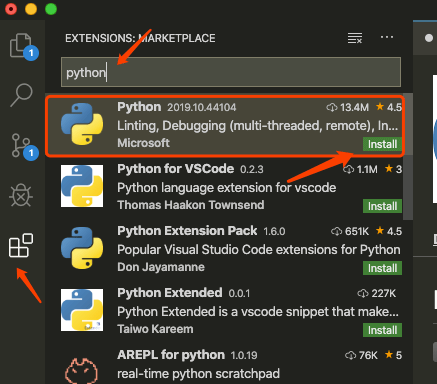
Note: Pay attention to the prompt of ‘Install’ button because restart MS VScode might be required
3. “Hello World”
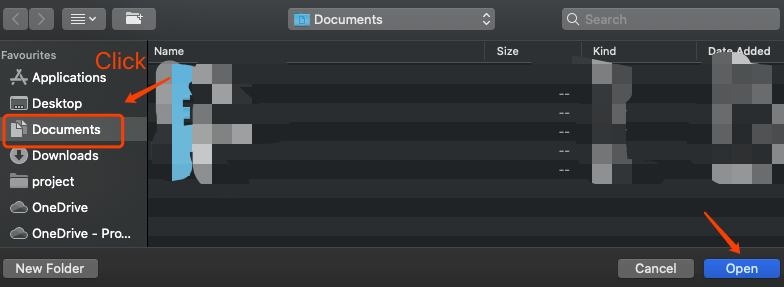
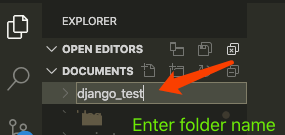
Select or create a folder for the Django project
E.g.: using ‘~/Documents/Django_test’ as the project folder
![Open folder-1]()
Open folder-1 ![Open folder: Document]()
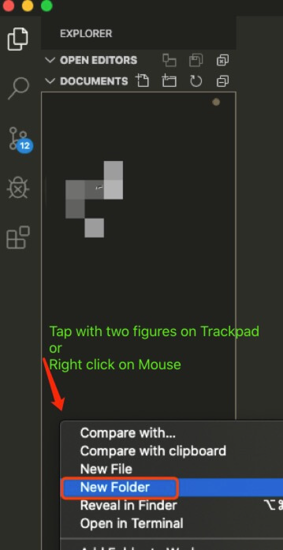
Open folder: Document ![New Folder-1]()
New Folder-1 ![New Folder-2]()
New Folder-2 MS Code, Python verification
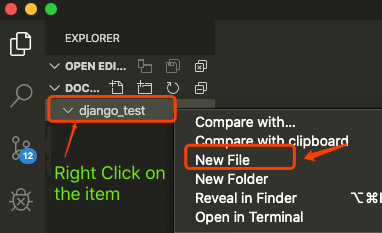
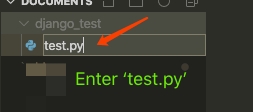
New ’test.py’ in the folder: ‘Document/Django_test’
![New File-1]()
New File-1 ![New File-2]()
New File-2 The file will be loaded in the editor area, enter
print("Hello world!"):![New File-3]()
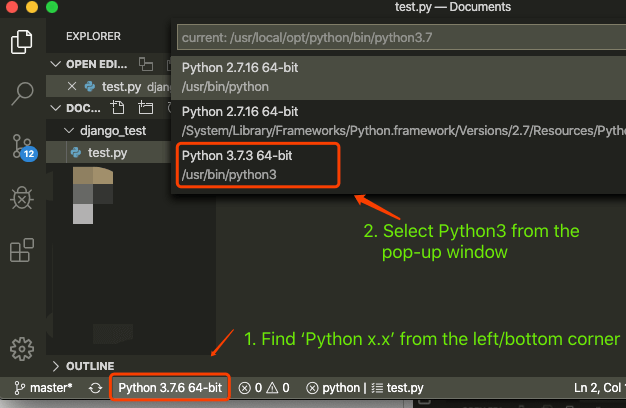
New File-3 Python2.x was installed on Mac by default, hence select Python Interpreter might be required before run the file:
![Interpreter]()
Interpreter Note: The info here might be different from yours because of OS, Python version differences.
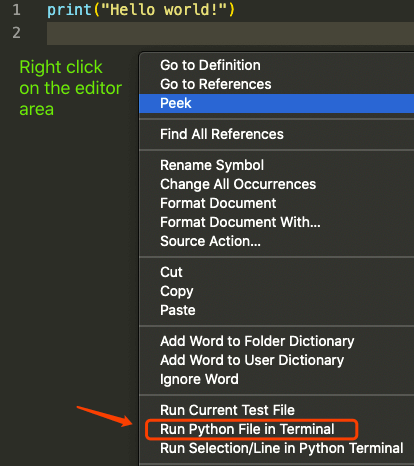
![Run Py file-1]()
Run Py file-1 A terminal toolbar will pop up and the Py file will be executed:
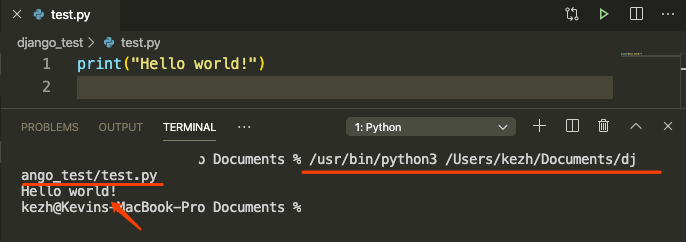
![Run Py file-2]()
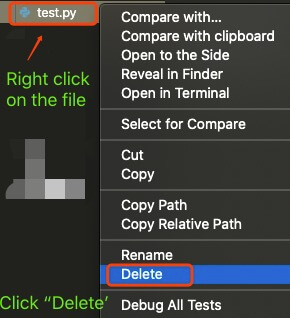
Run Py file-2 Since verification is done here, delete test.py file
![Delete file]()
Delete file


4. Install virtualenv, Django
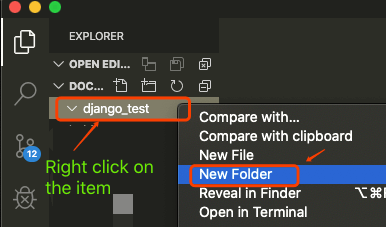
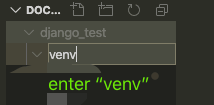
Create a folder: “venv” inside the project folder for the Python virtual environment
![New Folder-1]()
New Folder-1 ![New Folder-2]()
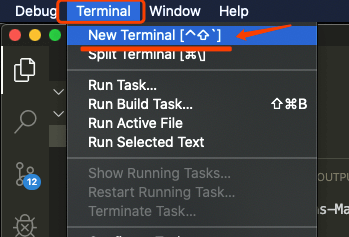
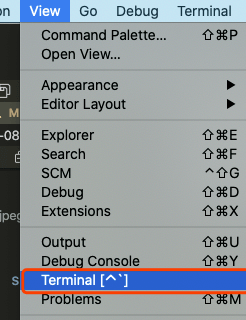
New Folder-2 Find “Terminal” from menu:
![Active Terminal]()
Active Terminal Note: The hotkey to active the terminal on Mac OS is
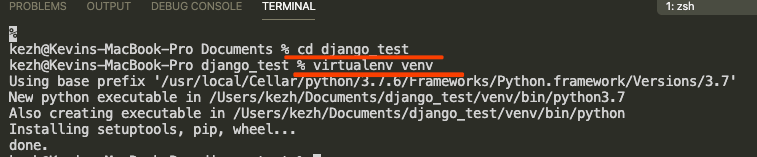
Control + `In the pop terminal window, execute the commands:
pip3 install virtualenv
cd Django_test
virtualenv venv
Sample for last two commands:
![run commands in terminal]()
run commands in terminal Note:
For homebrew, you might meet the permission issue, it can be resolved by executing command:
pip3 install virtualenv --user. Here is the example:Note: Please task care of the highlight content, especially line: 16-17.1 2 3 4 5 6 7 8 9 10 11 12 13 14 15 16 17 18 19 20 21 22 23 24 25 26% pip3 install virtualenv Collecting virtualenv Downloading https://files.pythonhosted.org/packages/c5/97/00dd42a0fc41e9016b23f07ec7f657f636cb672fad9cf72b80f8f65c6a46/>virtualenv-16.7.7-py2.py3-none-any.whl (3.4MB) 100% |████████████████████████████████| 3.4MB 5.2MB/s Installing collected packages: virtualenv Could not install packages due to an EnvironmentError: [Errno 13] Permission denied: '/Library/>Python/3.7' Consider using the `--user` option or check the permissions.> You are using pip version 19.0.3, however version 19.3.1 is available. You should consider upgrading via the 'pip install --upgrade pip' command.> % pip3 install virtualenv --user Collecting virtualenv Using cached https://files.pythonhosted.org/packages/c5/97/00dd42a0fc41e9016b23f07ec7f657f636cb672fad9cf72b80f8f65c6a46/>virtualenv-16.7.7-py2.py3-none-any.whl Installing collected packages: virtualenv The script virtualenv is installed in '/Users/admin/Library/Python/3.7/bin' which is not on PATH. Consider adding this directory to PATH or, if you prefer to suppress this warning, use >--no-warn-script-location. Successfully installed virtualenv-16.7.7 You are using pip version 19.0.3, however version 19.3.1 is available. You should consider upgrading via the 'pip install --upgrade pip' command.> % pip3 install --upgrade pip --user Collecting pip Using cached https://files.pythonhosted.org/packages/00/b6/>9cfa56b4081ad13874b0c6f96af8ce16cfbc1cb06bedf8e9164ce5551ec1/pip-19.3.1-py2.py3-none-any.whl Installing collected packages: pip Successfully installed pip-19.3.1Please check the homebrew output highlight lines if you got the error:
command not found: virtualenv, , you could using/Users/admin/Library/Python/3.7/bin/virtualenvinstead, or adding/Users/admin/Library/Python/3.7/bin/toPATH.
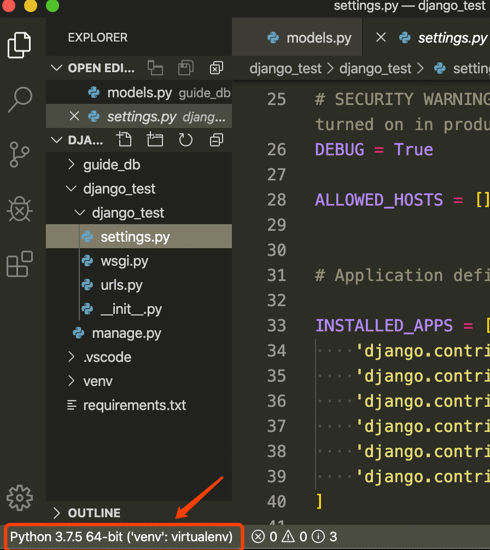
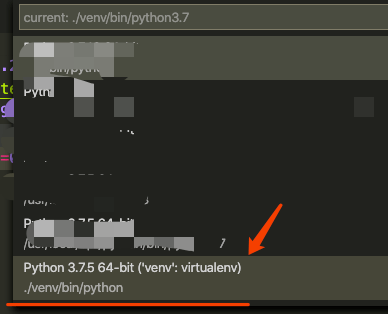
Active virtual environment in VSCode
![Active virtual Environment]()
Active virtual Environment ![Select VE depends the path]()
Select VE depends the path Install Django
![Active terminal]()
Active terminal ![VS Code active VE automatically]()
VS Code active VE automatically Execute the following command in the terminal to install Django:
pip3 install Django

5. Run Django
With MS VScode task feature, regular tasks could be executed easily, let’s say Django runserver command.
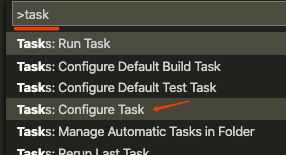
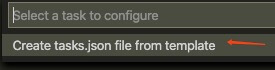
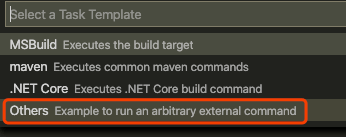
Configure task
![New Task 1]()
New Task 1 ![New Task 2]()
New Task 2 ![New Task 3]()
New Task 3 ![New Task 4]()
New Task 4 A new window will pop up, edit the file and save it. Here is a sample about tasks.json:
{
    // See https://go.microsoft.com/fwlink/?LinkId=733558
    // for the documentation about the tasks.json format
    "version": "2.0.0",
    "tasks": [
        {
            "label": "Run Django",
            "type": "shell",
            "command": "/Users/kezh/Documents/Django_test/venv/bin/python3 /Users/kezh/Documents/Django_test/testprj/manage.py runserver 0.0.0.0:8000"
        }
    ]
}
The command is consist of:
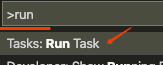
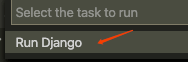
path_of_venv_python_bin path_of_Django_manage.py runserver host_addr:portRun task
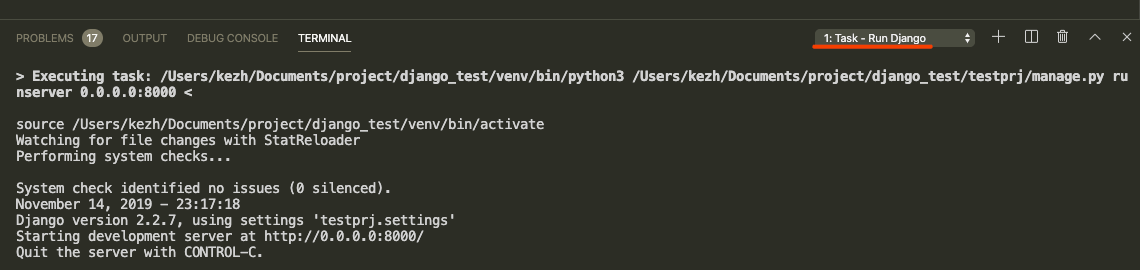
![Run Task 1]()
Run Task 1 ![Run Task 2]()
Run Task 2 ![Run Task 3]()
Run Task 3 ![Run Task 4]()
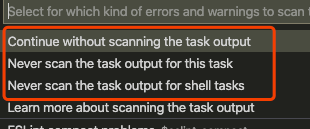
Run Task 4 ![Run Task 5]()
Run Task 5

Reference
- A tutorial about setup Sublime Text with Anaconda and multiple Python versions
- MS VS Code for Python debug
Scan the QR code using WeChat